Showing posts with label ICF. Show all posts

Sunday, January 31, 2016

Completed Air Barrier

Completed Air Barrier
So here is a run though of the important connections of our air barrier as we begin to prep for our 1st blower door test:

1) Sub Slab Radon Barrier - We installed a complete single sheet radon barrier before we laid down the sub slab insulation. This barrier was sealed and taped to the ICF foundation wall

---------------------------------------------------------------------------------------------------------------------

2) Basement Wall - The inner most EPS foam of the ICF will serve as the air barrier from the radon barrier to the rim joist. 

---------------------------------------------------------------------------------------------------------------------
3) Rim Joist - (See previous Post on the Rim Joist HERE)Before laying the flooring system we draped Solitex Mento over the poured ICF wall. This is what us Passive House Tradesmen call the "Floppy Bit". The Mento wrapped the rim board and was sealed to our above grade wall with Vana Tape. 

Rim Joist Detail

Mento To ICF connection

Mento to Zip Connection
---------------------------------------------------------------------------------------------------------------------

4) Above Grade Wall - We installed the Zip System to cover the exterior side of the interior wall. All seams were taped and all windows (except large south side windows) and doors (except front door) were covered. 


---------------------------------------------------------------------------------------------------------------------

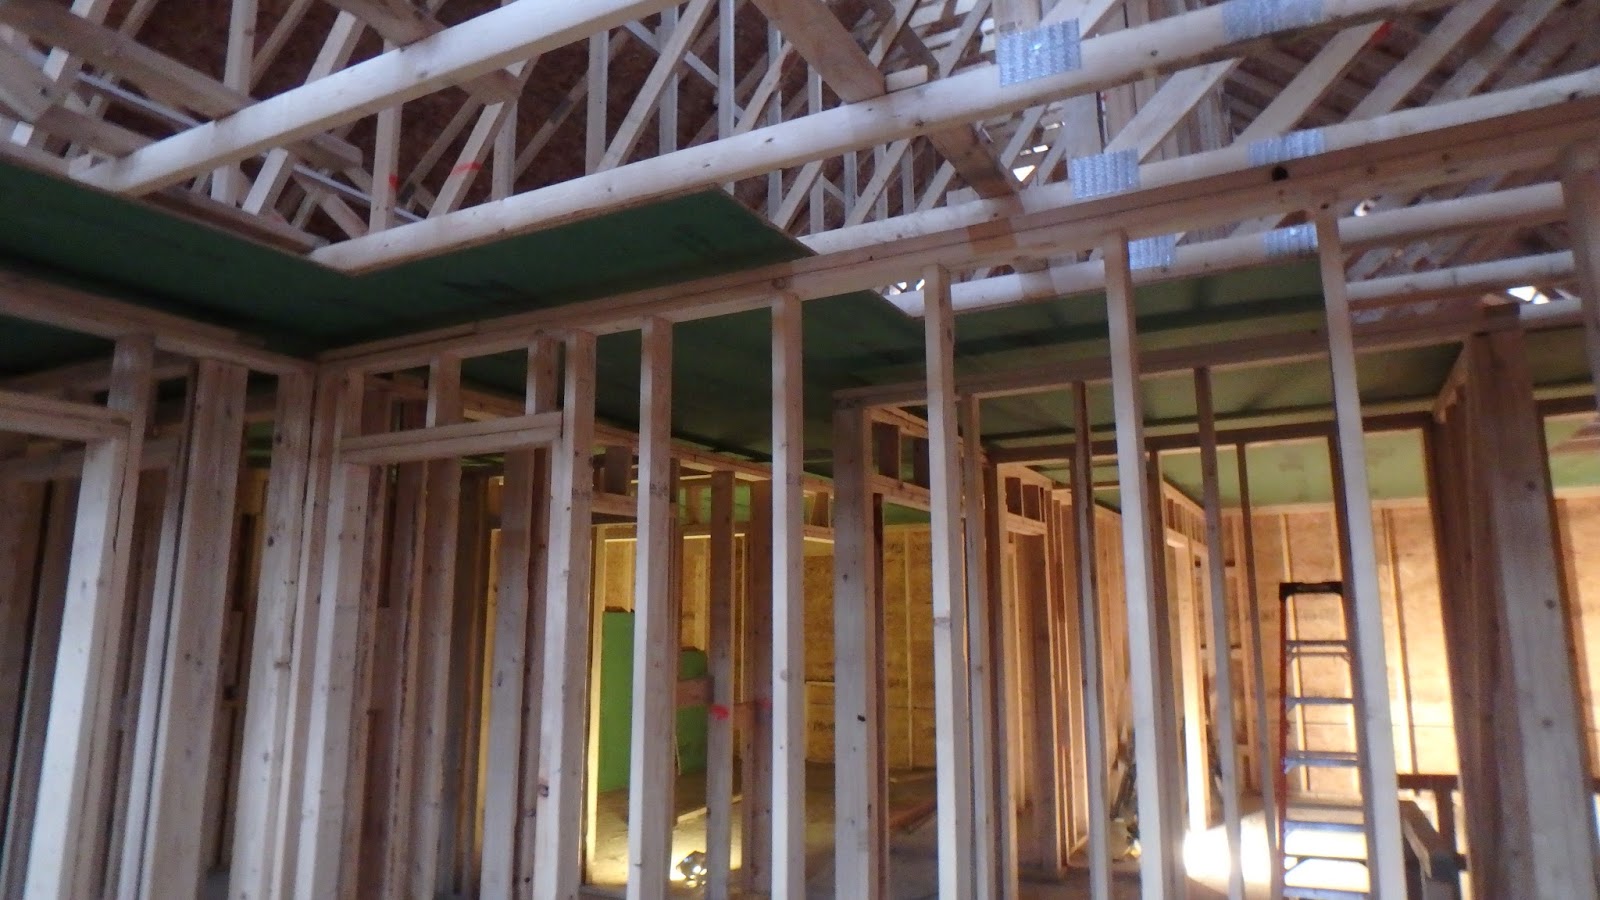
5) Eve line - Before we set the trusses we installed a strip of Zip System on the top of the exterior walls. This will bridge the air barrier from the wall to the ceiling.


6) 2nd Floor Ceiling - We installed Zip system on the ceiling of the 2nd floor, taped all seams. The 2nd floor finished ceiling will be furred down 2 inches to allow for light fixtures and wiring.


7) Preparing for the Blower Door Test - We had a few windows and doors we needed to seal up temporarily to perform the blower door test (Mainly the basement windows). I used a few scraps of foil faced rigid foamboard to seal the openings.

The 1st floor south windows Rough Opening has been prepped and we will be installing the windows  Monday! (More details on the window installation in a later post)

Next will be our and conducting our 1st blower door test! Stay tuned! 


Saturday, September 19, 2015

Construction Update 1

Construction Update #1

It has been a week or so since I did my last update. With regards to passive house details and different construction techniques, not much new has happened.

Basement waterproofing
In the Passive House world you hear the term "Belt and Suspenders". Basically double up on things to make sure you get the result you want. We used Mel-Rol; a water based liquid applied waterproofing membrane. Then we installed a prefabricated dimple membrane over that.


Finished grade will come to the top of the black membrane. Above that we will finish with a Conproco waterproofing product.

Basement Steel Delivery

We will have 4 posts in the basement that support 2 steel beams. The beams will only span from the front (West) side of the basement to the stairs along the back (East) wall. Remember we do have 8" of foam under the footer under the post.


Comfofond Heat Exchanger Tubing

When we had Zehnder design our whole house ventilation system we had them include the geothermal incoming air preheater. Basically, we will be pumping a brine through the tubing to a heat exchanger coil in the house and the incoming air will pass over it. This provides some tempering in both the summer and the winter.

In the summer the brine loop will "precool" the air before it reaches the air to air heat exchanger allowing the overall efficiency to increase and give us up to a half ton (6000 BTU/hr) of cooling.

In the winter the brine loop will "preheat" the air before it reaches the air to air heat exchanger allowing the overall efficiency to increase and keep the air entering the house within 3 degrees of extract air.

We will revisit the overall design of the system when we install the system later on.


According to Zehnder's design specs, based on our soil type, and system size we need roughly 200' of tubing 

Since the perimeter of our house is just under 160 feet - doing 2 full loops would be a little too long, so we went around 3 sides of the house and doubled back. Our total length of buried tubing is in the 230 feet range.  

Back Fill

Once the tubing is laid we can begin to push the soil back against the house. 

With the back fill done, you can see we need more dirt...

The Pond

We dug a pond to give us some "free" fill.


The overall pond is roughly 5000 square feet. We made it to 7 feet deep before we hit a natural spring.

We did find some really nice damp clay under the top soil. So this is what we used to distribute around the rest of the house.

Photo looking at the front of the house

Photo looking at the south end of the house

Photo looking at the back of the house

Photo looking at the north side of the house (Breezeway and garage side). 
We had to wait on the foundations for those for truck access to the raised fill septic system.

The tube you see sticking out of the ground is our sump pump. (The tubing sticking out is the temporary discharge line)

Exterior Sump Pump
I am not sure of you picked up on this at all from previous posts, but we will be incorporating an exterior sump pump to our house. This is very uncommon in new construction, but can be used in retrofit situations to keep basements dry. We did this for a few reasons.

  1. A sump pump pumps water out from around the foundation drains. These drain pipes are corrugated plastic pipes with small slits in them to allow water into them. When they are not filled with water they are excellent paths for radon in basements. the gasses can easily get into the pipes and into the sump crock in the house. We are building in a higher risk area of radon, and wanted to ensure we would be radon free. 
  2. A sump pump would be penetrating the sub slab insulation creating a pretty substantial "Thermal Bridge". There is no good way to insulate around a sump crock.
  3. We eliminate a penetration in the foundation wall where the pump would pump the water out into the yard.
Our exterior sump pump will discharge into our pond. We did make sure the building official and the pond engineer were OK with this situation before we decided to do it. The pump will be installed on a lanyard so it can be easily changed out in the event it fails and there will be an indicator light on a float switch in the even the sump pump either fails or cannot keep up with the incoming water.


We will be framing the deck soon and getting started on the septic system!  


Saturday, August 29, 2015

Building with ICF's

ICF's

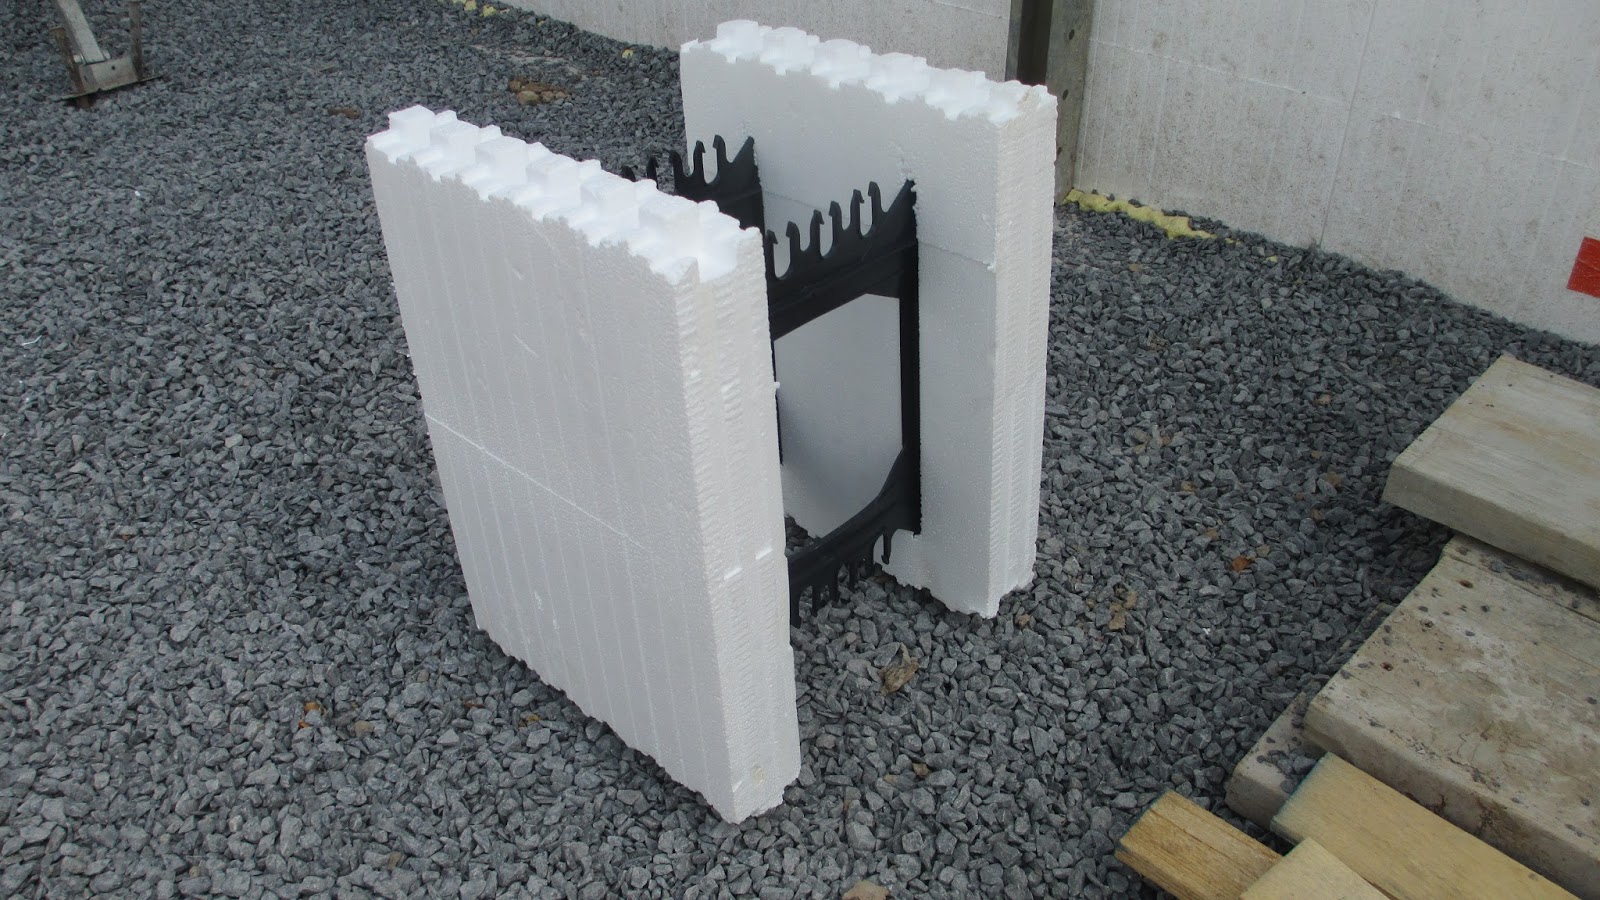
For those of you who don't really know - ICF's are Insulated Concrete Forms. Basically they are foam legos (4 feet long, 16" high and thickness varies depending on how thick you need the concrete to be). The foam blocks have an open core between the inner and outer layer that is filled with rebar and concrete to give you your structure.

Until we started building I thought all brands were essentially the same. Maybe the foam was thicker on some, but never thought they truly were different.

We researched Logix ICF and AMVIC ICF's. Both had some pro's and cons.

Logix has a higher R-value (R-22.5) and a more defined "web" to screw into, but the blocks need proper orientation for proper assembly (ie. Right hand and Left Hand Corners). AMVIC's blocks are universal - they can be used upside down and backwards to reduce waste. The R-value is slightly lower with the AMVIC (R-20), but we have the flexibility to increase the R-value of the basement wall slightly more to ensure compliance with the Passive House Standard. AMVIC also has to be installed in 2" increments due to the distance between the connectors (so your wall has to be 35'2" or 35'4"). Given we had not yet ordered the trusses and floor joists we had the extra play to slightly grow the wall an inch or so.

We decided to go with AMVIC ICF's.

The good news is - since we don't have a complicated shape (a rectangle) we could really minimize the waste and didn't use 3 entire pallets of material, which can be returned. This is the waste from the entire basement (7 blocks tall). Remember we had to cut some out for the 2 window opening as well. Actually in terms of waste weight and volume - the cardboard the ICF's were shipped in weighed more than all of the waste of the job. I was impressed! .

It was just enough to build a small playhouse for the kids!


Block Close Ups

The ICF is a pretty simple design. It has 2.5" of EPS foam, 8" of webbing adn 2.5" more of foam.
The black webbing made of plastic is spaced every 6" and provides the stability between the layers of insulation to hold the concrete in place. It also serves as a mounting bracket for drywall, lumber, etc. The plastic webbing also holds any necessary rebar in place with its clips. The outside of the ICF is expanded polystyrene (EPS) foam which has roughly an R-Value of R-4 per inch. So the overall R-Value is R-20. Trying to achieve an R-20 on a concrete block or poured foundation wall can be costly and add extra time to the build. For us to meet the Passive House standard we need an R-60 basement wall so the ICF is not enough insulation, so we will be installing a wall on the interior side of the ICF and insulating that with cellulose.

The Process

After the Capillary Break cured over night we began assembling the 1st course - starting in the corners. The 1st course blocks are zip tied together to hold them while you assembly the 2nd course. 

You assemble 2 full courses before you shim, level and glue to the footer.


Once the ICF's are level and glued to the footer you can continue building.

We finished 4 rows when we had to start assembling the bracing / scaffolding. The bracing we are using is called Plumbwall. The bracing is a free rental when you purchase the ICF's. 

It is screwed to the plastic webbing on each course 

It has a triangular support for the scaffolding and an angular support that is staked into the ground.

You can then set up the scaffolding on the top of the triangular supports. After getting all of the scaffolding up we could begin to build again. The final courses went fairly fast, again with the rebar in each course. Once all of the courses were done, the "new" courses had to be screwed to the Plumbwall system.

The final course we installed is called a "Tapertop" course. I don't know if this is a common course or not for homes, but because our exterior wall is so thick we needed some support for our flooring system and our exterior wall - since they are not on top of each other.

The tapertop course gives us more bearing area of concrete to set our exterior wall on. (Note: this detail is for a Logix Block - the AMVIC block tapers in both directions)


Once all of the rebar is installed and all of the braces are attached to all of the courses of block we  need to rough in our basement windows:

By thermal separating the window from the concrete we ensure there is no thermal bridging around the window. 

The window will be installed on the inside of the ICF foundation - really supported by the interior framed wall. This will place the window in the middle of the R-Value of the wall assembly.

Once installed, the entire perimeter of each window will have 2" of rigid XPS foamboard insulation.  We made our rough openings an extra 4" tall to account for this added insulation. 

Sadly enough it is all too common to have concrete directly in contact with the window frame with typical construction. We have added a simple extra step to make sure the concrete is completely insulated and isolated from all of the other components of the house. This is important to maintain a continuous thermal boundary.


Once all of this was in, there were just a few minor things we did to ensure a smooth pour. We added furring strips to the exterior to make sure the courses stayed together during the pour. 

We installed sleeves for the foundation wall penetrations (water line, plumbing line, etc). 


We also installed a string line to make adjusting the straightness of the wall simple.  

The Plumbwall system has a great adjustment strategy, simply adjust the nut at the scaffold level and you can move the top of the wall in or out to keep it straight.

All that is left now is to fill the ICF's with concrete!
The concrete pumper truck makes easy work of that!

Oh wait one more detail:
As you can see, the sill plate is recessed into the ICF form, so we can't bring the concrete all the way up to the top of the ICF.
 
If you look at the trowel the mason is using - it is basically a 2x4 with a small piece of OSB screwed to it to keep the concrete 1.5" below the top of the ICF so the sill plate lumber will fit into the groove!


Great Job by Ken Block and his crew! I'd highly recommend him -- visit his site for you next project

Next week we will be installing the sub basement slab insulation before framing begins!