Showing posts with label Window Installation. Show all posts

Monday, February 15, 2016

Window and Door Installation

Window Installation

Now that we have created a pretty airtight structure we can begin poking holes in it.

To ensure our next blower door test is as good as the 1st one we have to maintain our air barrier.


Step 1
Cut open the window rough openings
I was very impressed at how well the inner wall and outer wall rough openings lined up! 

Step 2
With the Zip board removed, we used 6" Grace Window flashing to extend the Zip System to the inside face of the inner wall. 
With the air barrier extended into the house we can build the solid window buck. 

Step 3
We chose to use 1/2" zip board (the cut out section of the window) for the 2 sides and top. We used left over sub floor for the sill. I figured the thicker sill material would be a good idea with a heavy window suspended between the 2 walls.

Step 4
Now we need to install our 2" rigid foamboard to insulate the window buck and prevent "short circuiting" around the window frame

Step 5
Install beveled rigid foamboard to window sill to allow for water drainage


Step 6
Wrap window buck foamboard with Solitex Mento. The Solitex Mento will be the connection between the Grace 6" tape and the inside surface of the window.


Step 7
Install stop blocks on the outside of the window opening so the window can be lifted and pushed flush to the stop blocks


Step 8
Prep the window - For fixed pane windows a metal clip is inserted into the UPVC frame. We can then screw the metal clip through the rigid foam into the solid buck.
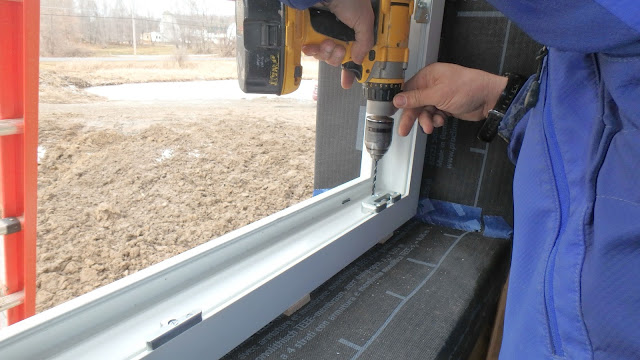
For operable windows we predrill holes though the UPVC frame. Once the window is in place we can install the screws from the Manufacturer. 


Step 9
Shim window and screw into place. Once in place we removed all of the shims (except for the bottom). 

Step 10
Seal the window in place
We filled the void between the Mento and the window with low expanding foam. Then we taped the Mento to the Window on all 4 sides. 


I hope this helps show that the detail of installing the Passive House Windows is just as important as the window itself. 

The door install is very similar with a little change to the threshold.


Because the low profile threshold of the doors (The bottom of the door is only 3/16" above the bottom of the frame) we cannot install to door directly on the subfloor. We raised the door 1" with a combination of rigid foamboard and pressure treated lumber to maintain a thermal break and still give the stability due to the weight of the door. This way the depth of the flooring will not interfere with the operation of the door. 

Also, since the exterior doors are all in-swing we wanted to allow for full 180 degree swing. We installed the door to the inside of the wall assembly. 


With the windows and doors installed (except for the front door) we can begin the installation of our Rain Screen in conjunction with Rough Plumbing and Rough Electric. Our 2nd Blower Door test will be coming shortly as well!


Wednesday, July 22, 2015

Window Installation

With all of the engineering and design that goes into a house like this, why would window installation be any different? EVERYTHING in a passive house is modeled, examined, and optimized thermodynamically. For now we will be talking about the thermodynamic analysis of the Passive House Windows and how this translates to the positioning of the windows within the wall system.

A typical new construction window comes with a nailing flange that is part of the frame of the window. This requires the window to be nailed directly to the wall, resulting in the window being flush with the outer edge of the exterior wall.


Passive House windows don't come with the nailing flange, this allows flexibility in location of installation within the wall system. The fact is, in a thick wall (12 inches or more, further details on wall thickness will be addressed in a later post) you typically don't want to install the window on the outside of your wall. You want to install the window in the middle of the assembly, or more specifically, as close to the middle of the R-Value of the wall as possible  (if your wall assembly includes more than one type of insulation, this may not by the exact middle).

This detail is from a 475 Blog Post that goes into quite a bit of detail regarding installation of air barriers to windows to achieve Passive House Level air tightness.

So in an effort to not bore your with thermodynamic details - here is why we want to keep the window in the middle of the wall:

It is more efficient - this simple detail can reduce your heating demand by as much as 22%

It is more comfortable - it helps keep all of the surface temperatures of the house within 6 degrees of each other, eliminating all of the cold drafts

It is more healthy - With such consistent temperatures, there is little opportunity for condensation, which means there is little opportunity for mold growth.

I found a fantastic page on Therm Analysis. The photo below shows an example window thermal analysis.


Thanks to ECO Houses of Vermont for the above detail!

Basically a Therm Analysis identifies the temperature gradient though a solid material. The rainbow colors shows how heat is flowing though the material. Looking at the photo's above; The image to the left has the window installed to the outside of the wall assembly. The isotherms are disrupted by the location of the window. This will result in colder spots where the frame of the window meets the wall.

The center image shows the window installed in the middle of the wall assembly. The isotherms seem to be pretty aligned.

The far right image also shows the window installed in the middle of the wall. In this case the window frame has also been wrapped in insulation. This added insulation further decreases the disruption of the isotherms. However the ability to add the extra insulation is a function of the size of the window frame.

Pretty amazing how just moving the window to the middle of the wall has a measurable impact on energy efficiency, and surface temperature two key elements for Passive House efficiency and comfort.

In my next post I am going to get into a little bit more on Therm analysis and Thermal Bridges.